
11 Comments
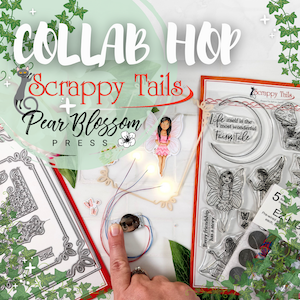
Magical Light up Cards Collaboration Hop with Pear Blossom Press
Scrappy Tails Crafts and Pear Blossom Press is excited to collaborate together with a fun magical light up Youtube and Blog hop! Each project along the hop features Scrappy Tails stamps and dies that light up with Pear Blossom Press' EZ lights and Halo lights!

I created a slimline shadow box card that lights up! You all know, I love a double interactive card, and it was surprisingly easy to hide all three lights and wires inside the box!
Video Tutorial
Card Making Process

Using the Scrappy Tails "Slimline Shadow Box" die set, I constructed my card base with heavy weight white card stock and strong double sided tape (see video above). The fairies on the card are from the Scrappy Tails "Fairy Friends" 6x8 stamp set and coordinating dies. I colored them in with my Prismacolors.

Included in the die set, are panels to decorate your shadow box. I cut two of the smallest rectangles and two of the largest rectangles from the set to ink blend my night sky onto. The distress oxide inks I used were: Seedless Preserves, Blueprint Sketch, and Chipped Sapphire. On all four panels, I hot foiled the "Fairy Dust Swirl" hot foil plate with gold foil. This added a gorgeous shine and a lot of interest to the sky.
I ink blended Seedless Preserves and Blueprint Sketch to two A2 Cloud coverplates that I cut from white card stock. Since it's an A2 sized die, I cut the rectangle apart so that I was left with strips of clouds that I could easily glue behind my shadow box window.

Last bit of ink blending: Using the "Starry Night Sky Layering Stencil Set, I created two yellow moons using Scattered Straw and Antique Linen Distress Oxide inks. I cut one moon out from a circle die that left a white edge. The second moon, I cut from a small circle to add to the scene inside my shadow box.
Here's a great look at the full sized moon that I added to the back of the card. It's great for adding a personal message!

The inside scene of the card was created with various Scrappy Tails die sets including the "A2 Cloud Coverplate" , and the "Slimline Everyday Borders 2" die set.
To create the cloud bridges, I just glued my vellum and white clouds directly do the bridges included in the "Slimline Shadow Box" die set.
To create openings for my lights to peek through, I cut some small stars from my clouds. Behind the cut outs, I added vellum and my lights. The third light is hiding behind a star cut from my ink blended background. The Fairy Dust Swirl Hot Foil plate actually cuts some of the stars out if you use your Gemini Hot Press!
The only thing left to do, was to hide all of the wires and the battery. I hid the battery on the top right of the card, behind my frame. To indicate that this card lights up, I white heat embossed a "Press Here" sentiment onto a blue die cut circle. This is from the Lawn Fawn "Push Here" 3x4 stamp set. I taped all of the wires behind my cloud "bridges" going across the scene. Overall, you can barely see any wires unless you look very closely!

Thank you all for participating in our collaboration hop. Remember to hop along and comment on each person's blog and video to enter into the chance to win one of two $25 gift certificates to Scrappy Tails and Pear Blossom Press!
The next person on the hop is Carol Hintermeier!
11 Comments
I have 3 great granddaughters that will each get variations of your beautiful card. Thank you so much!! Looking forward to getting my order so I can get started. Love supporting a small business who sources from home!!
So incredibly beautiful!!!
So gorgeous! Love it!
Pure magic!
I love this card. That is such a clever way to use the slimline shadow box dies. I have the dies and haven’t used them yet. I need to get them out of the packet and have a play.