
1 Comments
DIY Pop up Wedding Book Card + Matching Gift Box | GIVEAWAY WINNERS

Giveaway Winners!
Before we get started showcasing my projects today, I wanted to share the winners of our latest Youtube giveaways!
The winners of our Countdown to Christmas Inspiration Blog and Video hop are...

TRs Place

Project39 Mini Albums

Congratulations! All three of you win a $25 gift certificate to Scrappy Tails Crafts. Please email me at info@scrappytailscrafts.com to claim your prize! If I don't hear back within 72 hours, I will draw a new winner!
Thank you to everyone who hopped along with us, it was so fun! Stay tuned, we will have more fun giveaways and inspiration hops in the future!
Product Showcase Video Winner
Congratulations to Louise Hlewicki, you are the winner of our Countdown to Christmas product showcase Giveaway! Louise wins a $50 gift card to Scrappy Tails, Happy Shopping Louise!

Please email me at info@scrappytailscrafts.com to claim your prize! If I don't hear back from you within 72 hours, I will draw a new winner.
Alright, now lets get into today's projects!
Video Tutorial
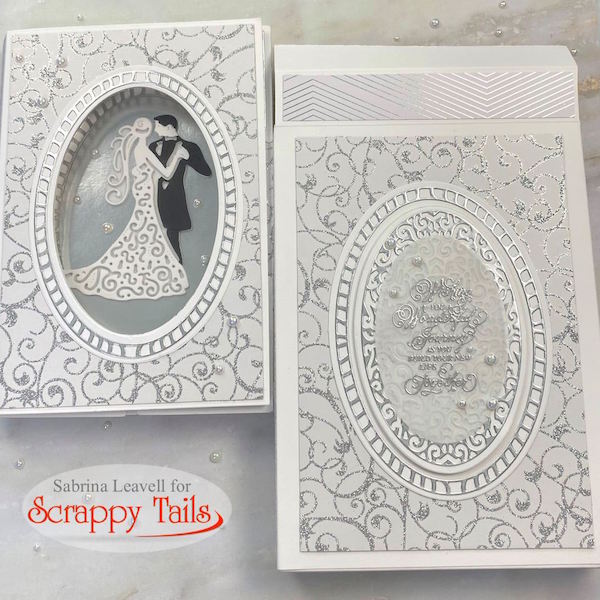
Pop up Wedding Book Card


Here's a look at how I decorated the inside of my book. I love how you can see the couple through the front of the book.


The shadow box frame was decorated with some more pattern paper and some decorative die cut corners, also included in the same oval die set.
This set is so versatile, I ended up using every single die that's included in the set!

Matching Gift Box

As I previously mentioned, I created my gift box by following a tutorial by @Jenny Card Designs. Her tutorial is really well thought out and easy to follow. This box is the perfect size for you shadow box book cards, no filling or extra padding is needed!
Since this was my first try making one of these boxes, I decided to do it off camera. Now that I created one, I can definitely create more and I certainly will, so stay tuned for a future gift box tutorial for an A7 and an A2 size!
Because I can't stop, I decided to even decorate my box with the same pattern papers that I used on my card. In the center, I added some more die cut decorative ovals.
I realized that I didn't have a sentiment for my card, so I decided to add one to my box! I silver heat embossed a beautiful wedding sentiment on a die cut vellum oval. Because I used vellum, you can partially see the lace oval through, super pretty!

Thank you all for stopping by today, I hope you enjoyed my tutorial!
For more inspiration please join us on the Scrappy Tails Crafts Facebook page! You will find even more stunning projects on the Scrappy Tails blog, Youtube, and on Instagram!
1 Comments
Congrats to the winners and this wedding set is gorgeous.