
1 Comments
Floral Frame 5x7 Card
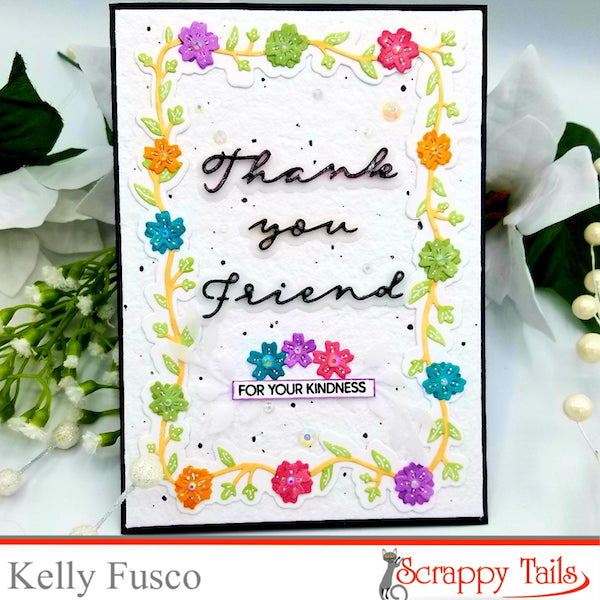
Hi friends! For todays post, I am creating my very first 5x7 card using the Scrappy Tails Crafts A7 Flower Cover plate die.

Start by die cutting the flower frame border from heavy weight white card stock. Using Copic markers and a white gel pen, I colored the leaves and vines on the frame.
I die cut the flowers separately from white card stock and colored them all in rainbow colors. A few of the flowers I double layered for extra dimension. For some added shine, I added a rhinestone to the center of each flower before adhering them all to my flower frame.

The next step was to die cut the shadow layer. To do that, I used the outer layer die and the inner layer die to cut from white textured card stock. Once cut, I glued my flower frame on top. Then, I glued everything to a textured watercolor panel.
I die cut the Thank you Friend 3x from heavy weight black card stock and stacked them up. I die cut the word shadows from vellum. I glued the sentiment in the center of the frame.
From my stash, I stamped out "for your kindness" and glued that below the die cut sentiment. I embellished it with a few small flowers and die cut vellum leaves.
Finally, I adhered my panel onto a black side folding A7 card base and splattered the card with some black acrylic paint.

1 Comments
I love the bright colors in contrast with the white. Perfectly charming!