
3 Comments
Heat Embossing on Holiday Cards | Holiday Card Series Day 1
Video Tutorial
Close Ups

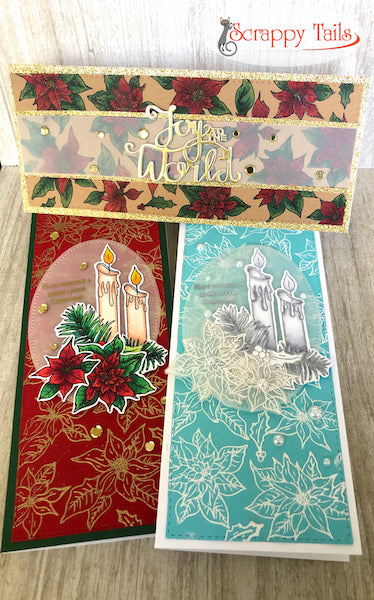
Personally, I don't do a whole lot of heat embossing on my everyday cards. However, when it comes to holiday cards, I love to pull out my metallic and glitter powders! For this card, I gold heat embossed all of the poinsettias from my Candle Light Poinsettia 6x6 stamp set onto a red stitched rectangle slimline panel. The candle and poinsettia centerpiece was colored in with my copic markers and die cut from their coordinating dies. The markers I used for the poinsettias were (R59, R29, R17). The markers I used for the greenery were (G29, G16, G14). The markers I used for the candles were (E13, E11, E00) To help the candles stand out against the busy background, I layered them on top of a vellum oval. The sentiment was gold heat embossed onto the oval. The card was finished off with a dark green matte and a scattering of gold confetti sequins.

Often times, when I love a card design, I remake it in a different color scheme! Just by changing the red and gold embossing to blue and white embossing, I was able to change the style from a more traditional elegant look, to a beautiful icy wintery look! Instead of coloring in the poinsettias for this card, I just white heat embossed them on vellum! To keep my candles white, I opted to silver heat emboss them on white cardstock. I added some shading to them using my C gray markers (C4, C2, C1) For this card, I embellished the panel and poinsettias with pearls.

For my final poinsettia background, I stamped the flowers onto a kraft panel with black ink. I clear heat embossed them, so I could color all of the flowers in with my copic markers. I used the same red and green markers that I used on card one. Instead of a vellum oval, I went with a simple vellum strip across the whole card. I added two skinny gold glitter strips to the top and bottom of the vellum strip. I cut the Joy To The World world die three times from white card stock and once from gold foil cardstock. I adhered them all together to create a dimensional word die and glued it to the center of my card. This card was finished off with a gold glitter matte and a scattering of gold confetti sequins.
Pop up Boxes


Here's the inspiration behind my three cards today. The first two pictures were created with my new A7 Pop Up Box die set. The last picture was created with my new Slimline Shadow Box die set.
Challenges
This blog post is a submission for the Simon Says Stamp Wednesday Challenge: Anything goes
3 Comments
I loved these cards, so I replicated them…. I hope you don’t mind….. I will be posting on Instagram later this evening. I love all your dies and stamps…. the poinsettia stamp set I had not gotten a chance to use yet so I tried this coloring….. I always feel intimidated by the coloring but when I get started I have so much fun….. Thanks for all your creations and inspiration……😍😍
Muchas gracias. ?Como puedo iniciar sesion?
Cialis Drug Information Encalm [url=https://xbuycheapcialiss.com/]cialis vs viagra[/url] Tymnramy cialis 5 mg tablet