
0 Comments
Hoppy Frog Card that Lights up
I'm so excited that you've stopped by today! I have my very FIRST light up card to share!! I have always wanted to try one but have been intimidated by them. Friends, I'm here to tell you not to wait!! Pear Blossom Press makes it SO super easy with their EZ-Lights! Let's take a look shall we?

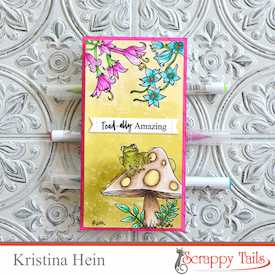
My card uses brand new products from the Scrappy Tails Crafts' June release. When I saw the Fairy Botanicals stamp set, I knew I had to have it! The little toad stole my heart.

The first thing I did was create a few masks for the three stamp images I planned to use on my card. Then, I ink blended the panel with three Distress Inks. The colors I used were Old Paper, Shabby Shutters and Forest Moss. Once everything is blended, I removed the masks.

I used my Misti to line up the stamps with the corresponding blank areas. The Misti made this step a breeze. I did go in with a tiny blender tool to add Distress Ink to the few areas I didn't cut perfectly out of the masks.

Then, I colored the stamped images using Zig Clean Color real brush markers.

Now for the fun part. Adding the lights! It couldn't be any easier. I poked 3 small holes where I wanted the lights to be. I lined everything up on the back and used tape to hold it in place. Then I added a double layer of foam tape.

I cut a bright pink cardstock panel to go behind the frog panel. I felt it was a little plain, so I used a pink Copic marker and a ruler to create some quick stripes.

I adhered both panels to a 3 1/4" x 6 1/4" mini slimline card base. I stamped the sentiment on a banner die cut and glued it to the card. Let's look at the lights!