
0 Comments
Hot Foil Sunshine + BONUS Card
Hello my friends! Have you seen the brand new Tropical Bliss release from Scrappy Tails Crafts!? Oh. My. Word. It's absolutely fabulous! You can see it all HERE!
Hot foil plates have made it back to the Scrappy Tails shop and I wanted to use them right away!

Look at that gorgeous shine!
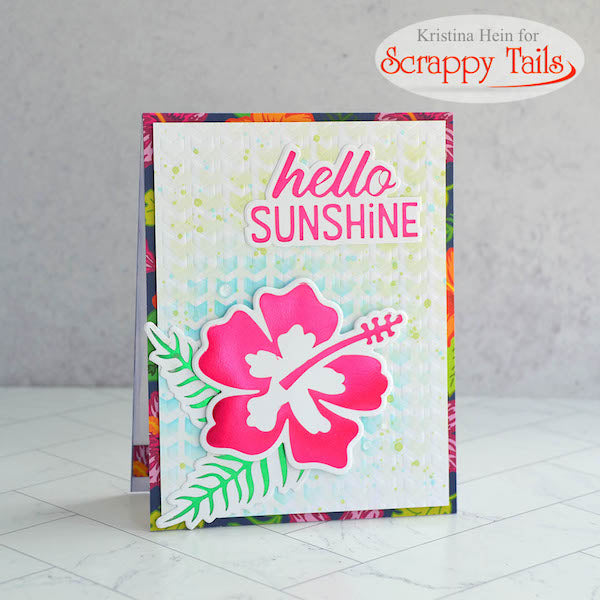
I started by blending green and turquoise inks onto a white panel using the new Chevron 6x6 stencil. Then, I splattered it with the same ink colors mixed with a shimmer liquid.


Then I used the stencil to emboss the panel. I purposefully did NOT line up the embossing with the stenciled colors. This way creates more visual interest.

I set the panel aside to work on the hot foiling. I used the Hibiscus hot foil plates with a bright pink foil and a bright green with the leaves. I then used the coordinating dies to cut out the pieces.

I cut down the hibiscus patterned paper from the new Tropical Bliss 6x6 paper pad to an A2 size. Then, I adhered it to a white card base. I added foam tape to the back of the stenciled/embossed panel and glued it on top of the hibiscus paper.

I played around with the placement of the flower and the leaves. I used liquid glue for the leaves and popped up the flower with foam tape. The sentiment was also adhered with liquid glue. To finish it off, I added some clear Nuvo drops which I have recently rediscovered in my stash!

Since I was having SO much fun playing with new goodies, I had to make another card! For this card, I used another paper from the Tropical Bliss 6x6 pattern paper pad. I also used the A2 Triangle Pattern cover plate die to cut out some blue paper. I used liquid glue to adhere it to the patterned paper. This muted the background and added some nice texture.

I stamped the parakeet from the new Tropical Birds 6x8 stamp set onto Bristol Smooth cardstock. I used my Zig Clean Color Real Brush markers to color in the sweet birdy. I cut it out with the Tropical Birds coordinating dies.
I didn't want the bird to get lost in the patterned background, so I cut a piece of heavy vellum using a diamond shaped die. I adhered the bird to the vellum with foam tape. Then I hid my liquid glue on the back of the vellum behind the bird and added it to the panel.

My sentiment is from an older stamp set called Fairy Sentiments. I trimmed them down and glued them into place. I did add some clear Nuvo drops again to the left of the bird, and that's it!