3 Comments
Peek-a-boo Window Card
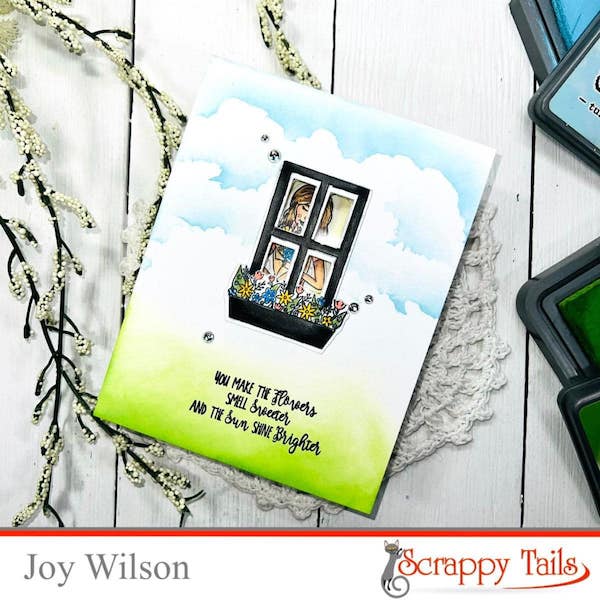
I started off by partially die cutting the Flower Shop window die in the center of the card base so that the window panes would be “open”.
Then, I stamped and Copic colored the flower box window and the girl holding a bouquet of flowers. After that, I die cut the images and began the process of building my scene.
To build the scene, I stenciled on some clouds with Tumbled Glass Distress Oxide Ink. To give the illusion of grass, I blended Mowed Lawn Distress Oxide Ink onto the bottom of the card. Next, I stamped a sentiment from the same Flower Shop stamp set using Versafine Nocturne Ink.
Once all of my ink blending was dry, I glued my window and a few sequins to the center of the card design.
After completing the front of my card, I positioned the lady so that her face and her flowers were peeking through the window. I also blended Squeezed Lemonade Distress Oxide Ink around her to make her pop!
At this point I just wasn’t sold on this design yet. I went back to what Sabrina always says… “adding acetate takes your cards to the next level making them more professional looking”. I then die cut another window frame and adhered an acetate window onto it and then sandwiched it between the existing one! I love that the acetate makes it look like a glass window.
Video Tutorial
The video definitely explains this process in more detail. Feel free to watch it for additional tips and tricks on how to make see through window cards!
Thanks for stopping by today!
Follow Joy on Social Media!


3 Comments
Hi. I was wondering if you have announced the winner of the contest yet? I can’t find the May 6 blog post. THANKS!
This really is a great design and layout!
Beautiful background and inside!