
1 Comments
Set Sail Summer Collection Showcase
Product Showcase Video
Map Cards

For the next few weeks, I will share a variety of card tutorials featuring new products from the latest Summer collection. I'm starting with our incredible "Caribbean Map" bundle. With it, I made 5 cards. Let's take a look!

Included in the Caribbean Map bundle is our:
Caribbean Map 3 layering stencils
This set works beautifully together to create vintage Caribbean sailing or treasure maps, You can also use the products separately, which I will demonstrate.
Video Tutorial
To see an in depth card making process for each map card, be sure to check out my video tutorial above!
Card One

My first design showcases all the products used together to create a vintage scroll shaped map card.
I started by stamping the "Caribbean Map" 6x8 background stamp onto kraft card stock. To make the map shiny, I clear heat embossed the image while the black ink was still wet. Then, I used the coordinating stencils to color the map.
Then, I used the large A7 scroll from the "Compass Scroll" die set, to cut out my map. Next, I added some "Walnut Stain" Distress ink to the edge of my map to really make it look old.

I paper pieced the compass and the fountain pen from the same "Compass Scroll" die set to create two focal points on the card.
From the new "My Guiding Light" 6x8 stamp set, I white heat embossed a sentiment and die cut it out with it's coordinating die. I thought the sentiment was very fitting and complimented the compass nicely!
Finally, I arranged all of my die cuts onto the map and accented it with navy blue pearls.
Card Two & Three

Using the "Caribbean Map" stamp and stencil, I made two "atlas" style cards. One is a little more bright and modern, while the other is slightly more masculine and vintage inspired.
I absolutely love how these background turned out, I think they'd look great on Scrapbook layouts too!

My vintage card was made by stamping and clear heat embossing the "Caribbean Map" on kraft card stock with black ink. Again, I colored the map using the coordinating stencil set. To give it that vintage look, I added Stormy Sky Distress ink for the "ocean" and Walnut Stain around the edges.

I wanted to showcase as much of the background as possible, so I opted to add a simple hot foiled circle rope frame with a beautiful gold heat embossed sentiment inside. As a finishing touch, I added a few sand colored pearls.

The background on this card was created the exact same way, except this time, I stamped the Caribbean Map on light blue card stock to resemble the oceanic areas of the map. Around the edges, I lightly blended Vintage Photo Distress Ink.
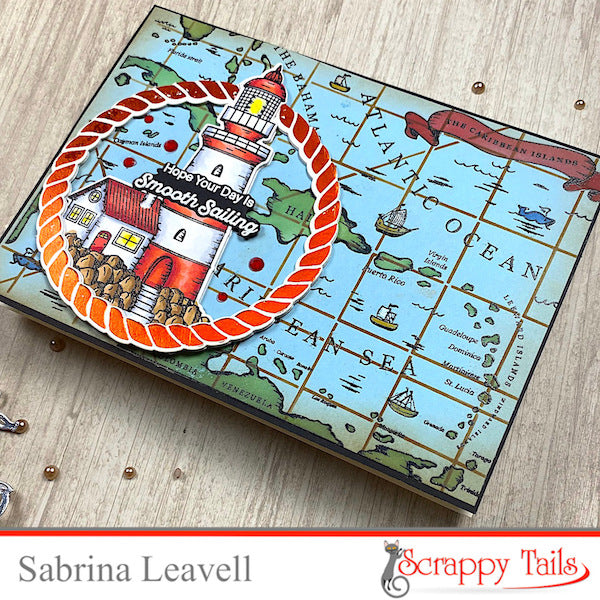
This time, I accented the map with a red hot foiled rope frame, a white heat embossed sentiment, and a lighthouse stamp that I colored with Copic Markers!
Card Four

For card four, I made another shaped card, this time, only using the scroll from the "Compass Scroll" die set.
I cut the entire scroll from kraft card stock and ink blended "Walnut Stain" Distress ink around the edges.
I cut the bottom of the scroll twice from navy blue card stock. I cut the tops of each piece with a wave border. on the bottom navy piece, I ink blended "Black Soot" Distress ink for some slight contrast between the two waves.

After gluing my bottom wave pieces, I added a pirate ship that I stamped and clear heat embossed with black ink on beige card stock. At the top of the scroll I added a compass. Both the ship and compass come from the new "My Guiding Light" 6x8 stamp set, and they were both colored with Prismacolor pencils. I stamped them on beige card stock so that the coordinating die border wouldn't be a stark contrast (i.e white).
To finish the design, I added a white heat embossed sentiment from the same stamp set and accented the card with a few navy and sand colored pearls.
Card Five


1 Comments
Hello Sabrina,
This is the BEST male collection I have ever seen! I am excited to get started on the dies I bought at Stampfest!
Thank you