
1 Comments
Simon Says Stamp August 2019 | 10 cards 1 kit | part one
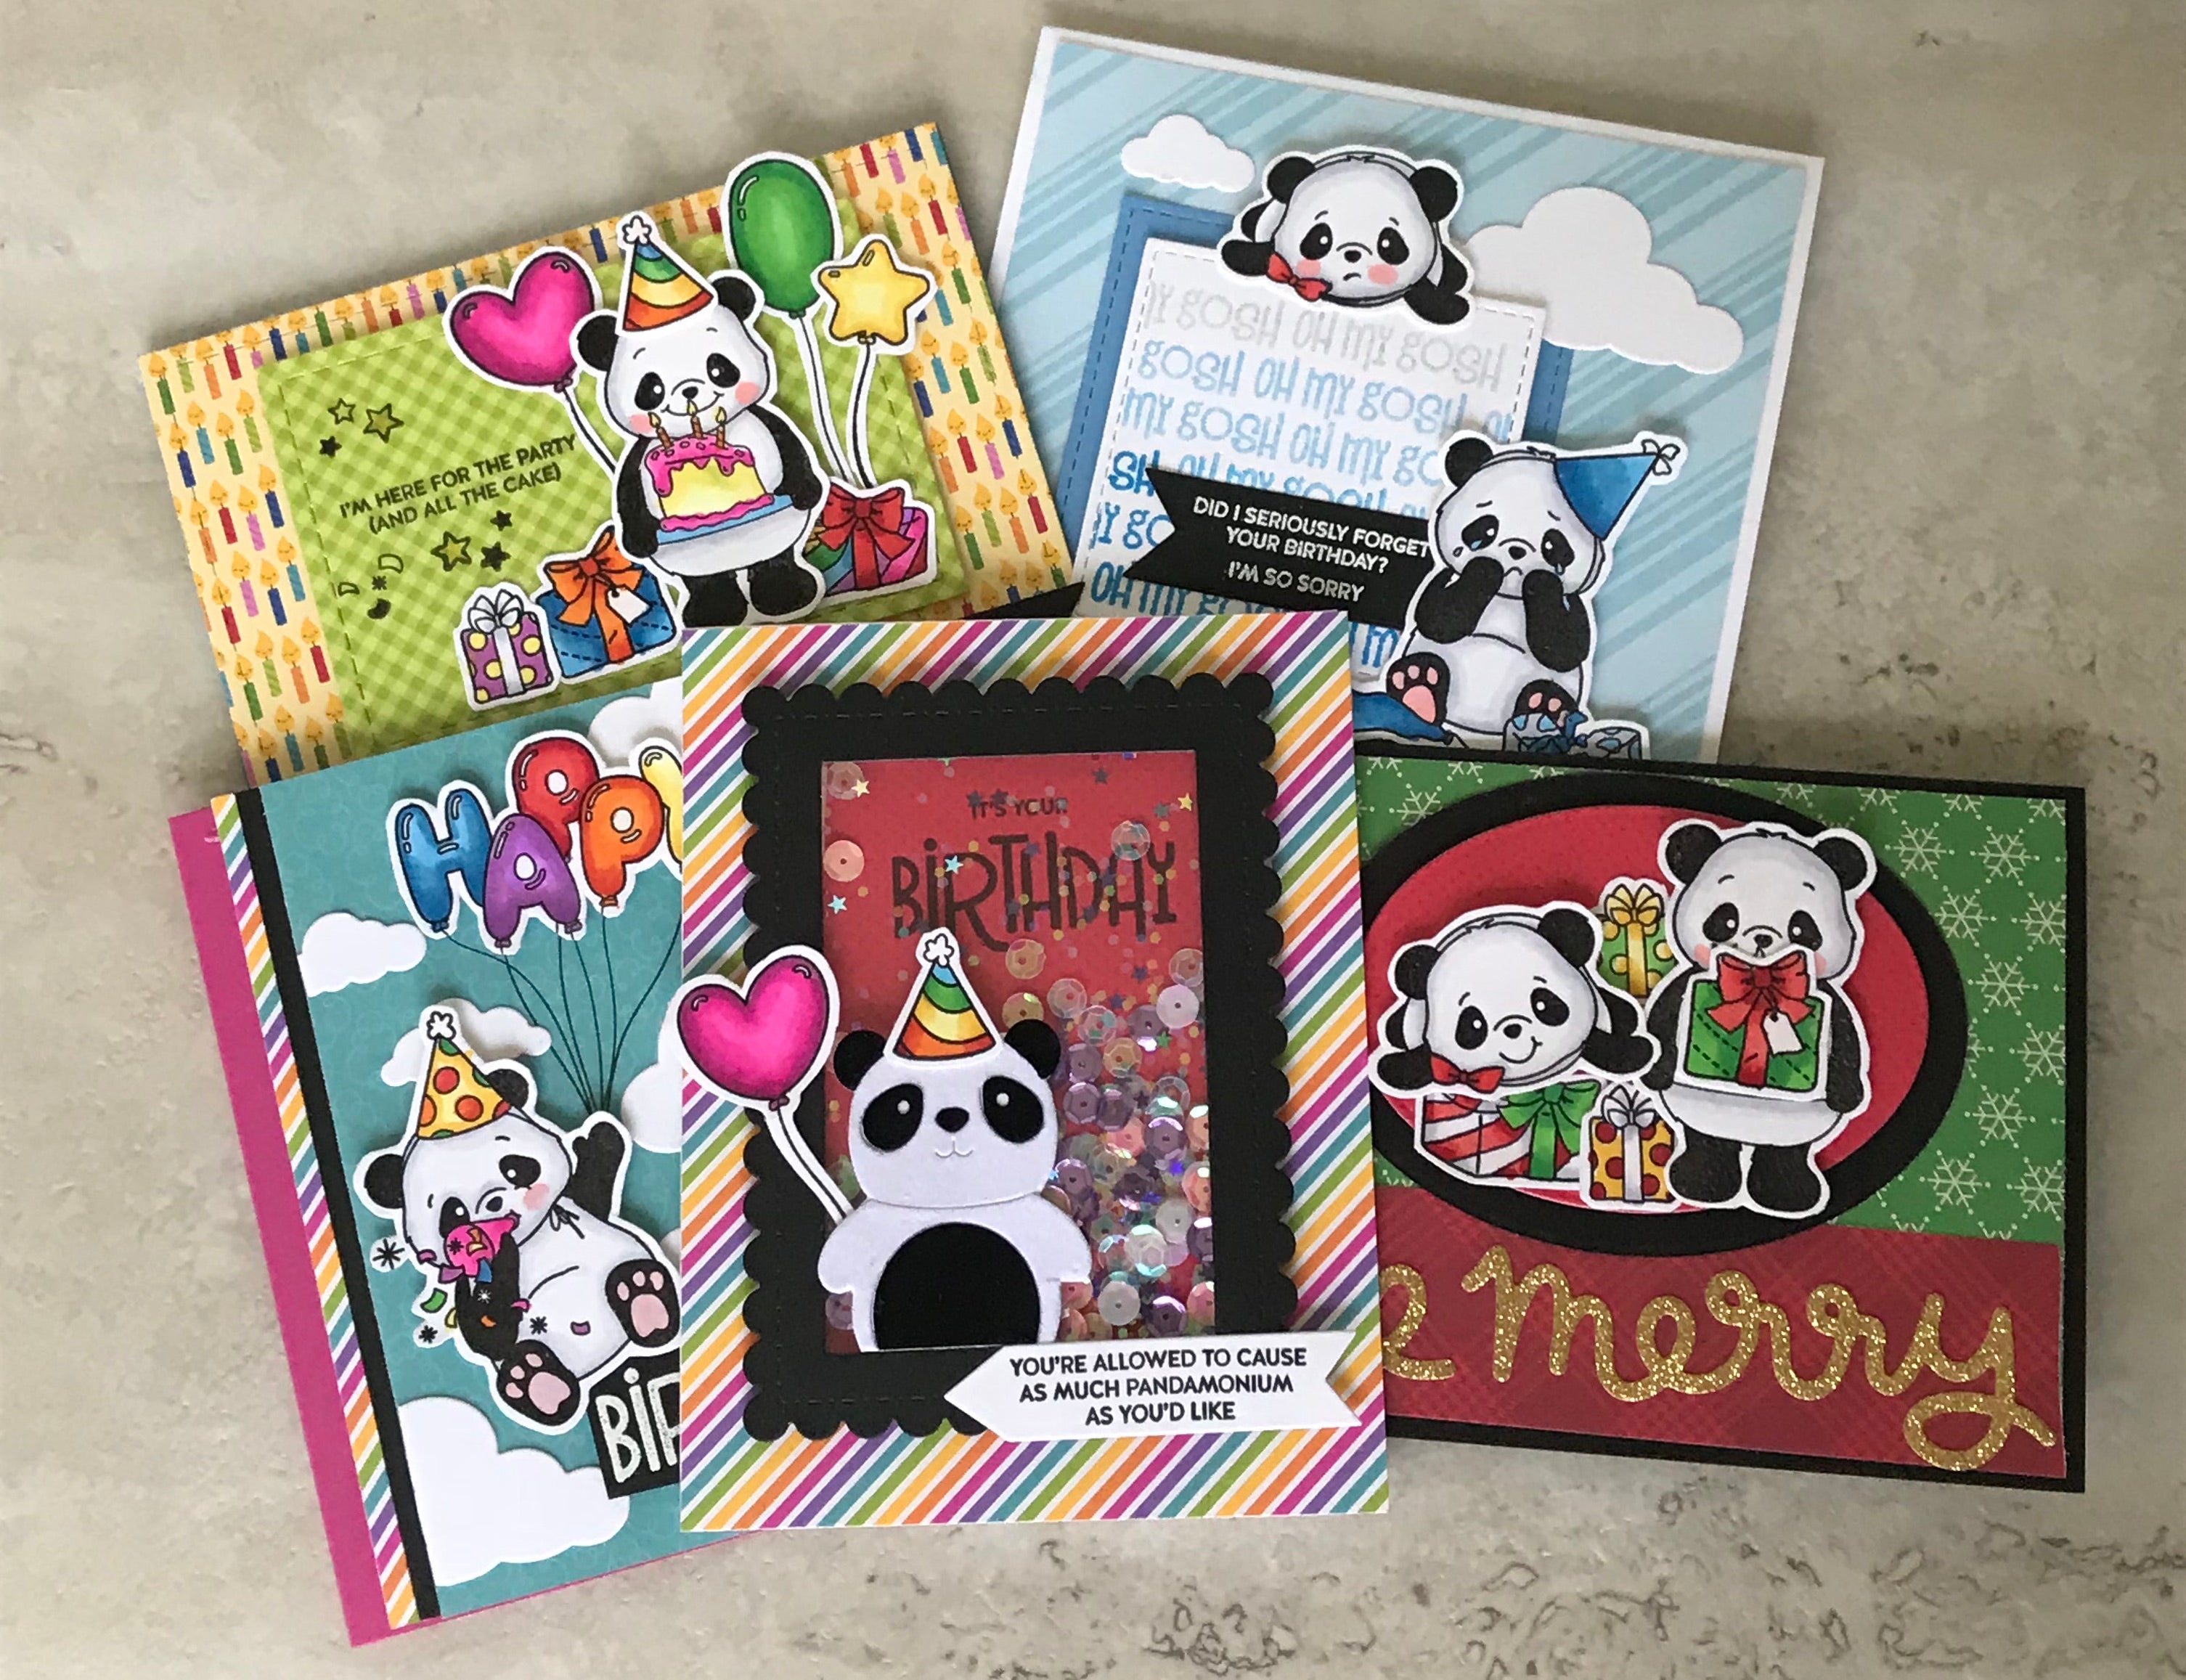
Hi everyone, today I'm showcasing the first 5 cards that I created with the Simon Says Stamp August 2019 card kit! I used the stamps, card-stock, pattern papers, flocked papers, sparkle pen and the panda die that came in the kit to create these adorable panda themed Birthday cards! Let me know what you guys think in the comments below, I love to read feedback on my cards. Note, I clear heat embossed all of the stamped images so I could use my copic markers with my Versafine Onyx Black ink. I really love the black crisp image that this ink provides. I colored all of the stamped images with my copic markers. I decided to color most of the birthday balloons/ accessories in rainbow colors to coordinate with the pattern papers that came in the kit. I also created my A2 sized card bases using the heavy weight card-stock that came in the kit. Below, I have provided a list of extra supplies that I used and a link to my video tutorial that explains how I created these cards! Thanks for stopping by <3
Card One:

My very first idea that came to my head when I received this kit, was to create a cloud scene using the panda with his hand up and the "Happy" balloons that came in the stamp-set. This card is fairly simple, I just cut some of the cloud pattern paper down to a 3 inch strip and added a few die cut clouds on top. I decided to pop up my balloons, panda and Birthday sentiment with some foam tape. To further accent the panel, I decided to add some scrap strips of black and rainbow pattern paper to either side of the cloud panel.
Card Two:

Who knew a panda themed Birthday stamp-set could also work for Christmas?? I'll admit, I'm not completely out of the "Christmas in July" spirit, so I thought it would be fun and different to come up with a Christmas themed card using the August kit. To create the Christmas vibe that I was going for, I decided to color the presents in some traditional Christmas colors: red, green, yellow and white. I created a small scene using some of the packages and the pandas. The panda that holds the package, is actually the panda that holds the cake. I just covered the cake with the present instead. I decided to pop up the 2 pandas with some foam tape on top of the red oval. I also popped up the red oval over the black one to add some extra dimension. I used some Christmas pattern papers in my stash to create the background. Finally, I added my sparkly gold "be merry" sentiment die cut to the bottom of my card.
Card Three:

Card three is the first of many "forgot your Birthday" type cards. I must say, I'm not good with dates and I have a feeling I will need a lot more than just one of these cards haha! To create this card, I first started off by stamping the "oh my gosh" stitched square panel. I created an interesting light grey to dark blue gradient using various memento dew drop inks. I then layered my two sad pandas on top and to the side of this panel. I also tucked my sentiment. "Did I seriously forget your birthday? I'm so sorry." sentiment banner behind my crying panda. I layered the "oh my gosh" panel on top of a larger blue stitched square using some foam tape. To further accent the card, I added some left over clouds that I had from card one! I wanted this card to be very monochromatic, so I opted to layer everything on top of a diagonal light blue striped paper from my stash.
Card Four:

This card is absolutely cheerful, I love the bright yellow and lime green colors on it! This card is pretty simple, I decided to create a scene using the panda with the cake and a few of my fussy cut balloons and packages. I stamped the sentiment "I'm here for the party (and the cake)" next to my panda. I thought that was very fitting, don't you think? I also went ahead and stamped a few confetti and stars around the sentiment to give it a little something extra. (not that it needs it haha) I popped up my green plaid panel with some foam tape above the candle pattern paper. Below my panda scene, I also popped up a black banner showcasing another "Happy Birthday" sentiment, which was white heat embossed.
Card Five:

It wouldn't be a 10 cards 1 kit video if there wasn't at least ONE shaker card, so here it is. I decided to cut the panda die from some of the black and white flocked paper that came in the kit. This made the panda so CUTE and FLUFFY, I love it! I added a rainbow party hat on top of his hat and gave him a pink balloon to hold. The shaker features a "Happy Birthday" sentiment inside it. I decided to add pink, purple, clear and white sequins inside the shaker. (I didn't go to overboard with it, although I could have) I stamped another sentiment "You're allowed to cause as much pandamonium as you'd like" onto a white die cut banner, which I attached to the bottom of my black frame.
Video Tutorial
Supplies
NOTE: I am using affiliate links for some of the products listed below. If you decide to use these links, know that I will receive a small commission off of your purchase. This is no added cost to you as the consumer, it's just a way for us crafty friends to support one another!
If you're interested in purchasing one or more of the items below just hover over the product and click!
Yay! The Simon Says Stamp website is having a sale on all of their products right now. Use offer code: SSSFLASH at checkout to receive 20% off your order!
- Simon Says Stamp August 2019 Card Kit- SOLD OUT :(
- Simon Says Stamp homepage
- Simon Says Stamp monthly card kit subscription
- Simon Says Stamp "Party Like a Panda" clear stamp set
- Simon Says Stamp "Picture Book Panda" wafer die
- Memory Box "Puffy Clouds" die set (small version)
- Darice " Nesting Ovals" die set
- Lawn Fawn "Scripty Be" lawn cuts die
- Lawn Fawn "Scripty Merry" lawn cuts die
- My Favorite Things "Stitched Square Stax" die set
- Your Next Die "Stitched Scalloped Rectangles" die set
- Heartfelt Creations "Banners and Arrows" die set
- Uline Double mounted foam tape
- Art Glitter Glue
- Versafine “Onyx Black” Ink
- Versamark watermark ink
- WOW clear embossing powder
- Memento "Summer Sky" ink
- Memento "Gray Flannel" ink
- Memento "Bahama Blue" ink
Challenge
This blog post is a submission for the Simon Says Stamp Monday Challenge: Midsummer Blues
1 Comments
All 10 of your cards are so cute. Thank you for sharing.