0 Comments
Tone on Tone Die Cutting
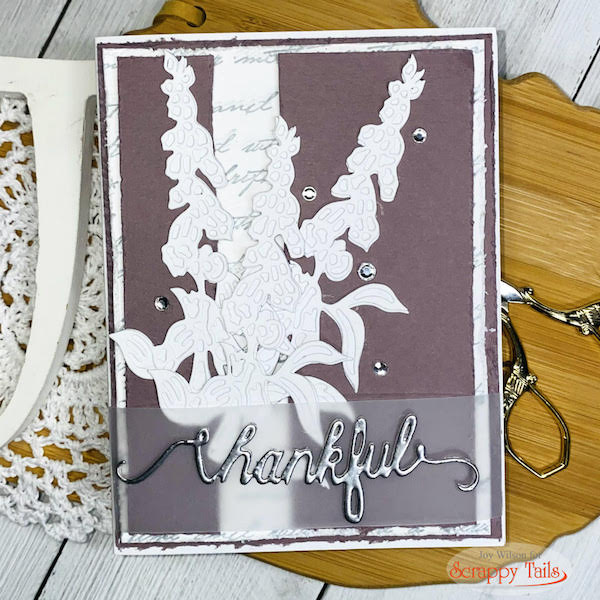
Hello friends! Joy, here with another fabulous card for Scrappy Tails Crafts! Today, I went with a simple, yet elegant design for a thank you note that features the Fairy Flowers die set. I chose to only feature one flower using both the detail outline layer and the solid layer to create a tone on tone flower. Let's take a look at the card...

To create this card, I die cut and glued both layers of the fingerling flower from the fairy flowers die set. I made three total flowers for this card. I cut both layers from white cardstock to create a tone on tone effect.
I cut down a panel of plum cardstock to 4x5.25 inches and another one to 3.75x5 inches and distressed the edges of both panels. On the smaller panel, I trimmed about 1.25 inches from the center to add a little peek a boo feature in my design. I went with a pattern paper that has beautiful scripty words to peak through the plum cardstock.
Using a "thankful" die cut, from my stash I heat embossed it with silver embossing powder to add extra shine and dimension. I glued my word die onto vellum.

My last steps were to arrange the beautiful bouquet of Fairy Flowers and embellish the card with bling. I think it turned out gorgeous and was relatively easy to pull together. I sure hope you will give it a try or something similar to make it your own!
I hope that you have enjoyed this card and will give it a try! For more inspiration please join us on the Scrappy Tails Crafts Facebook page! You will find stunning projects on the Scrappy Tails blog, Youtube, and on Instagram!
Follow Joy on Social Media!
