Slimline Pop Up Box Craft Die
3 In Stock
Scrappy Tails Crafts
Craft Dies
Product description:
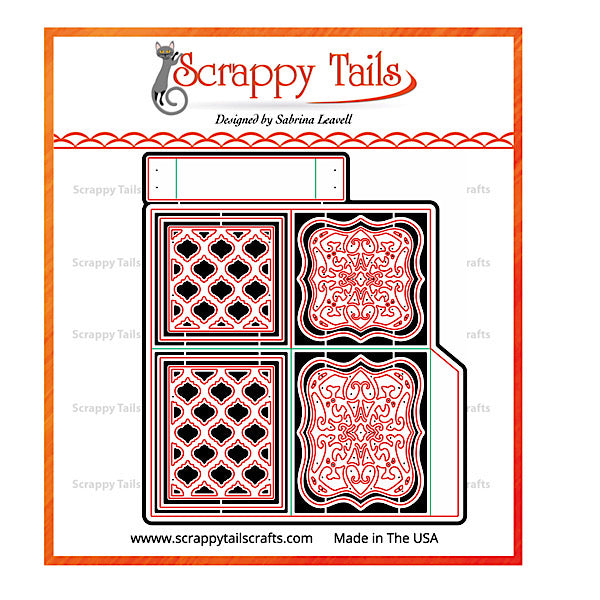
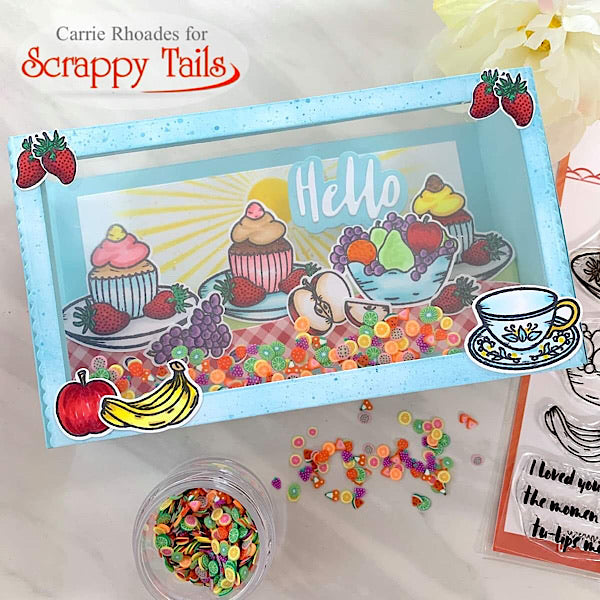
This is an interactive pop up box die to create a slimline style pop up card with the measurements of 9x4 inches, when folded flat. Folded flat the box fits a standard #10 business slimline envelope. Included are the following dies:
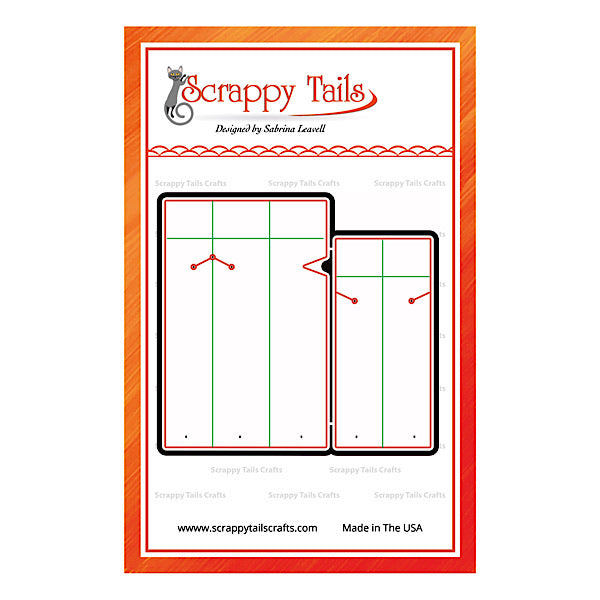
- The main box craft die used to cut a slimline pop up box (must cut two panels for one box)
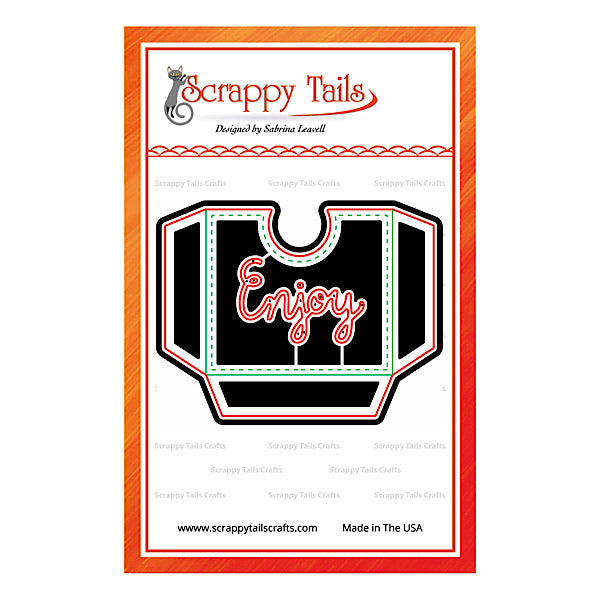
- One bridge, used to hold and pop up interactive images (May cut up to three bridges for a full display)
- Four different sized decorative panels to accent your box
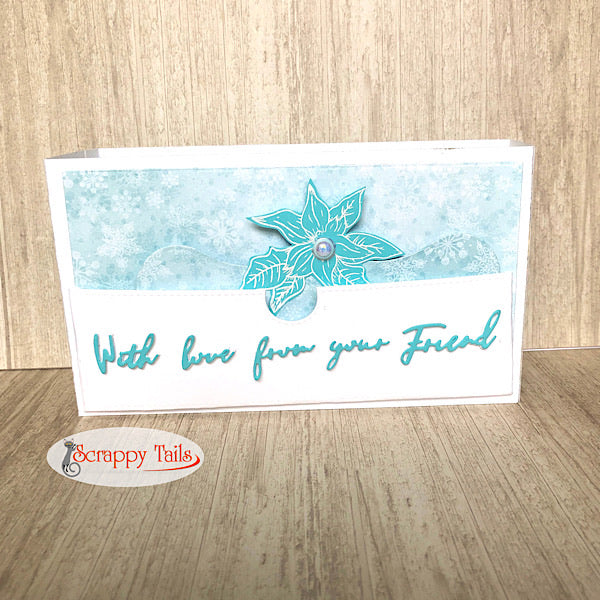
- Bonus: small word dies that fit as sentiments on the card. Words include: “Thinking of you, I love you, Thank You, Dear, Friend, Sister, Dad, Best, Mom” - words can be mixed and matched for different custom sentiments
Directions for metal craft die use:
- Gently remove the metal craft die from it’s packaging
- Using your favorite die-cutting machine, lay a piece of strong card-stock facing the sharp edges of the die and run the required “plate sandwich” through your machine (please note that different machines use different die-cutting sandwiches)
- These dies are thin steel dies and they work in most available manual and automatic die cutting machines, such as your Vagabond, Cuttlebug, Gemini, Gemini junior, Spellbinder’s Platinum, Big Kick, Big Shot etc.
- Dies work on different thin materials, including paper, cardstock, specialty foiled or glitter papers
- To assemble the box, cut the main box panel twice, fold the score lines and connect the tabs of the panels to each other’s box panels to create a three dimensional box. Fold down the left, right and front panel. We recommend to keep the back panel standing up to guide you as to the maximum height of the images to ensure the box will fit in a #10 envelope.
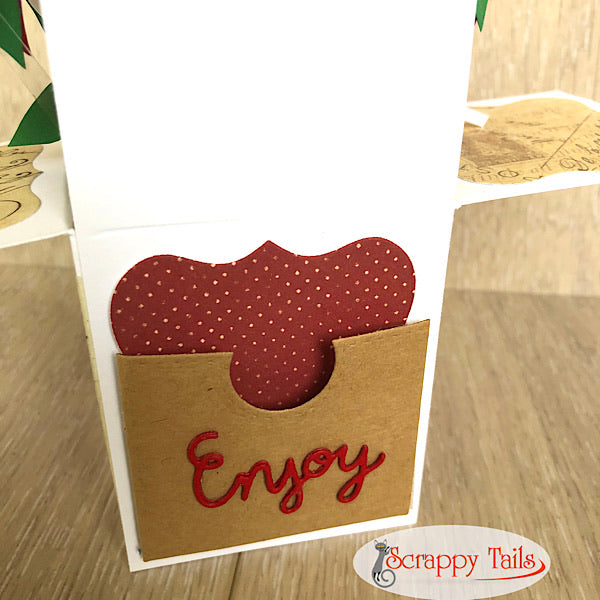
Please note: Use strong double sided adhesive to connect both pieces together. To make your Pop up box strong and long lasting, we recommend 100lb to 110lb card-stock. - Cut up to three bridges, fold on the score lines, attach strong double sided adhesive and place bridges inside the pop up box side panels, ensuring strong bond with the sides of the box
- Cut the decorative panels, if desired from colored, or designer pattern paper to create a beautiful design.
- Once your box is assembled, feel free to adore and embellish your project with stamped images, embellishments, and or die-cut images. You can attach images straight to the bridges or use acrylic sticks to create a floating design element or to suspend images in the air
- Share your beautiful projects with us at #scrappytailscrafts
For inspiration and technique tutorials, please visit our social media channels on YouTube, Pinterest, Instagram and Facebook. For detailed pop up box instructions, feel free to watch one of our slimline pop up box videos on youtube.
Related Products
From this Collection