

Tall Arch Snow Globe Add-On Metal Craft Die
130 In Stock
Scrappy Tails Crafts
Craft Dies
Product Description:
We are happy to present you with an opportunity to get your Christmas cards started early this year with Scrappy Tails Crafts new “Christmas in July Snow Globe Collection”.
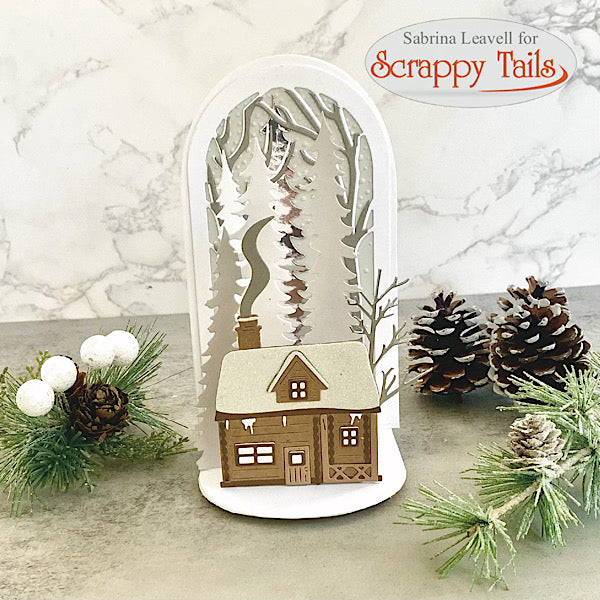
This Tall Arch Snow Globe Add-On die here coordinates with the Smaller Moving Podium and creates a smaller sized, three dimensional, interactive podium card, that can be moved up and down and is designed to display all of our beautiful Christmas images from the wonderful scenes, like for example a Victorian Christmas House-front or a pretty Church nestled in the woodsy tree line or maybe a whimsical scene with kids building a snowman or elves decorating their favorite skinny and tall Christmas tree.
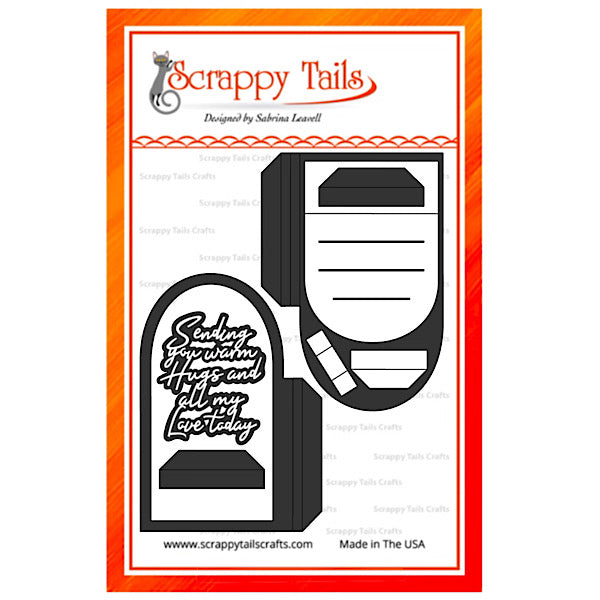
The Tall Arch Snow Globe Add-On gives you a taller, skinnier shaped Snowglobe - that can be used as a canvas to create your cool Snow Globe scenes. It includes a snow bank layer for the bottom of your Snow Globe, a snowy background that stretches the whole height of the tall globe and a cool double base that is designed to hold your sentiments or be decorated with your tree trunk or tree basket dies.
Down below, you can read more about our moving podium pop ups to learn more about how to build the cards. Please note, other dies mentioned below are sold separately l, unless you are getting the complete 12 piece “I want it all Christmas card kit”.
Basically, this podium allows you to pop up all of our new images or any image that you already have in your existing collection to build a quick and fun card scene, while allowing the card scene to be folded flat for easy mailing and then to be popped into place for easy display for the entire season. Of course this podium can be used for Christmas, but its use is all year around and you can use it in connection with other holidays and occasions and with your many other different stamps and dies. Scrappy Tails Crafts already has several add-on stamps and dies planned for the coming collections to give you even more curated scene building tools and inspiration. The podium itself has two additional slits build into the top to allow you to pop up your images easily through the bottom of the podium, while hiding your pop up mechanism from view. You can also use the included pop up stick bridges to glue additional images onto the top of the podium.
To give the podium the right amount of pressure and to allow it to stand upright more easily, you can use the build in two areas for one or two rubber-band(s) to create some additional wall pressure and card stability. Scrappy Tails Crafts sells the correct sized rubber bands (separately) and has YouTube video tutorials available that show how to install the rubber-bands to really create amazing podiums.
We suggest to use a 100 lb cardstock or higher (preferably a cover cardstock of 280gsm or better) to have enough strength to hold up all of your favorite images and to enjoy your home decor piece all season long and to ensure that your beautiful art piece gets pulled out again year after year.
As with most of other interactive Scrappy Tails Crafts die products, you are able to lay the podium flat for easy mailing. You can pull the podium downwards (which requires that all of your lower level images and illustrative elements are kept within the boundaries of your podium.) When pulling the podium structure downwards in order to flatten your card, you will be able to use a standard A7 5x7” inch envelope (as long as you keep the height of your popped up images plus the podium to no higher than a combined 7” inches.
If you want a wider display for additional scene building tools and the major “wow” effect, you will be forced to push the podium structure upwards in order to flatten your card for mailing. Whenever the podium gets pushed upwards, you will likely be just above the combined height of 7 inches overall, which makes the card too tall for an A7 envelope and will require that you use an 8x8 square sized standardized envelope (which does require additional postage within the U.S. and Canada and potentially in other countries as well, due to the square nature of the envelope, which does not fit many standard postage meter machines. Speaking of postage meter machines, we always strongly recommend that you mail all of your handmade cards and paper projects in bubble mailers and add verbiage to the front of your envelope to alert the postal worker to manually process your mail piece versus using any kind of mechanical sorting machinery that might otherwise potentially destroy your crafty work!).
We will be sharing technique tutorials and many beautiful interactive Snow Globes, fun pop up cards, tunnel shadow box cards and other gorgeous 3D card design samples on our YouTube channel and our design team is also ready to create some fabulous tunnel pop ups, trifolds and other interactive cards this year- so please keep your eye open on our social media and on our “Scrappy Tails Crafters” Facebook fan page.
Directions for metal craft die use:
- Gently remove the metal craft die from it’s packaging
- Using your favorite die-cutting machine, lay a piece of strong card-stock facing the sharp edges of the die and run the required “plate sandwich” through your machine (please note that different machines use different die-cutting sandwiches)
- These dies are thin steel dies and they work in most available manual and automatic die cutting machines, such as your Vagabond, Cuttlebug, Gemini, Gemini junior, Spellbinder’s Platinum, Big Kick, Big Shot etc.
- Dies work on different thin materials, including paper, cardstock, specialty foiled or glitter papers
- Share your beautiful projects with us at #scrappytailscrafts
For inspiration and technique tutorials, please visit our social media channels on YouTube, Pinterest, Instagram and Facebook.
Related Products
From this Collection